Preservation and Conservation
Articles about the suggested supplies, storage methods, and handling practices for original animation artwork.
- Storing Your Collection
- Cel Bags
- Itoya Binders vs Itoya Folios
- Microchamber Paper / Boards / Boxes
- Sun/UV Damage Examples
- Removing Adhesive Tape From Sketches Using Eucalyptus Oil
Storing Your Collection
Storing your collection is a task, especially if you are storing it with an eye to conserving your pieces so they don't melt into a puddle of Vinegar in a few years. There are some wrong ways to do storage but there are a lot of right ways to do storage.
Things to NOT do:
- Do not put pressure on the paint if at all possible
- Do not let the paint touch any fibrous surfaces like PAPER, acrylic paint likes to stick to these things and removing stuck paper can damage your cel.
- If you have unstuck layers, PLEASE keep them separate there is nothing worse than finding a piece where the cel layers have gotten stuck in a mismatched fashion.
- Keep your collection at a stable temperature and humidity, if at all possible, my house typically is 72 Degrees year round with an average of about 50% humidity (since I started tracking this) It's not as good as say the Disney vault but stability is important. Sudden fluctuations can cause mold to grow and paint and plastic to crack.
- Keep your collection in the dark as much as possible especially if you have pieces from Toei Studios, Toei had some of the cheapest production values of all the anime studios and their lines have no stability and in my experience fade even with proper storage.
Good Practices/Recommendations:
- Store each cel in a polypropylene bag, I use the BCW Treasury Comic Bags for standard sized cels, they are fairly cheap, easy to get and when you need to do a bag change it is not prohibitively expensive to do your entire collection
- Leave one side of the bag open to the air, and on the opposite side trim a small corner off the bag to promote airflow, you do want air flow, you do NOT want your cel to as I call it stew in it's own juices, this can make the deterioration of your piece move much faster.
- Put a zeolytic trap (like Microchamber paper), in each bag NOT against the paint, as it will stick, to help catch the gases that do not dissipate with airflow.
- For storage I recommend using the Itoya Binders (See article in the preservation section about binders vs. folios), no more than 24 cels per Binder, anymore causes the Binder to lose pages when you hang it (see next recommendation), also cels are heavy and the more you put in the book the heavier it is.
- For the binders it is possible to store vertically in a bookcase without putting undue pressure on the paint, however, I prefer to hang them in a closet with a blanket hanger it causes less pressure overall against the paint, and allows for better airflow.
Cel Bags
Plastic bags / sleeves made of Polypropylene or Polyethylene are a staple in the storage and preservation of animation art. They are usually referred to as 'Cel Bags' in the collecting community. They are safe to use for animation cels, sketches, and backgrounds. For sketches a longer term storage option is Mylar. Mylar is available in thicker options and lasts longer than Polypropylene or Polyethylene bags. They are more expensive but they graded for indefinite storage of paper arts. Please note that Mylar bags are NOT safe for animation cels. Mylar is known to stick to lineart/paint on cels so only use them for sketches.
 |
 |
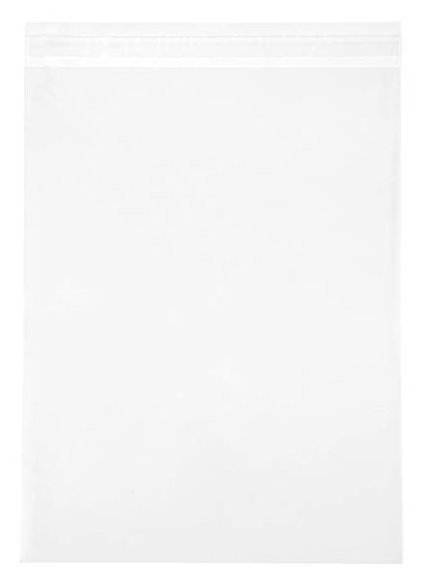 |
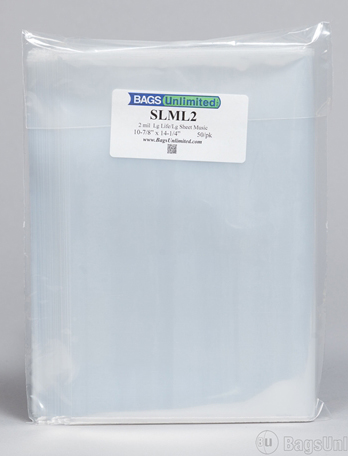
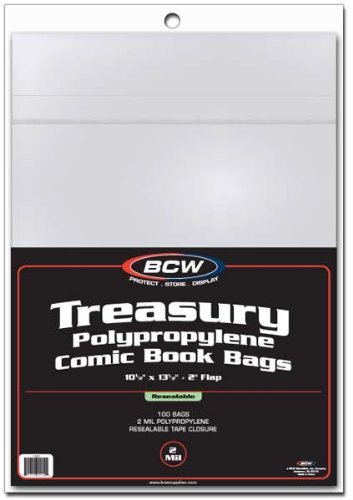
Examples of cel bags available on the market
.Tips for Using Cel Bags
- Check over you cels at least every year to air them out and check for vinegar syndrome
- Change the bags at least every couple of years (over time, cels out-gass fumes and the bag will ripple/warp)
- Put each cel layer (if layers are not stuck) in it's own cel bag
- Backgrounds and sketches should be bagged separately
- When bagging cels DO NOT seal the bag. Cels need to breathe!! Many collectors choose to cut off the sealing flap and leave one side of their cel bag open at all times. Other options include using a hole puncher to make holes in the cel bag or snipping off a corner of the cel bag. Another option is trimming the top and one side of the cel bag so there's an "L" shaped opening in the bag.
- When trimming cel bags DO NOT make any holes or cuts while the cel is still in the bag. Safety first !
Where to Buy
Polypropylene and Polyethylene bags for Cels or sketches
BCW Treasury Polypropylene Bags (10 x 13 in) at Amazon.com
LARGE Life Magazine/Large Sheet Music Sleeve (10 7/8 x 14 1/2 in) at BagsUnlimited.com (available as Polypropylene or Polyethylene, additional sizes available on site)
10 x 13 in Polypropylene Bags at ClearBags.com (additional sizes available on site)
Mylar for sketches/paper artwork
11 1/2 x 14 1/2" 2 mil Mylar Bags at http://www.bagsunlimited.com (additional sizes available on site)
Itoya Binders vs Itoya Folios
Itoya Multi-Ring Binders
 Itoya Multi-Ring Binder 11x14 in Itoya Multi-Ring Binder 11x14 in |
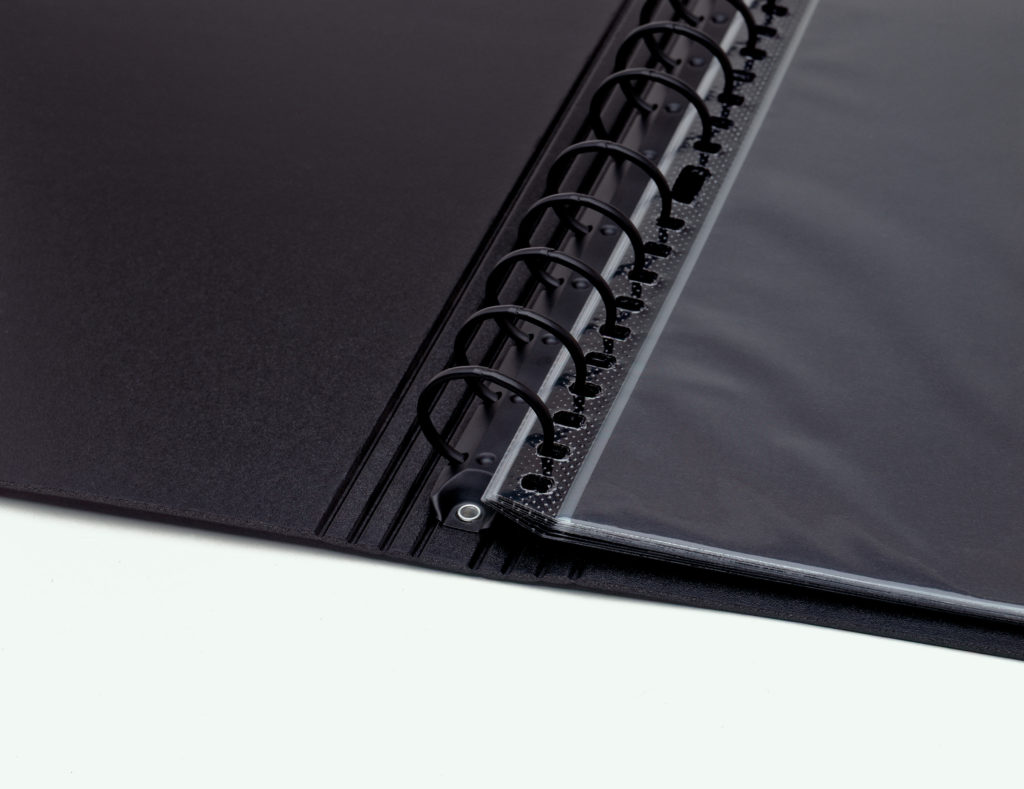 Inside detail Inside detail |
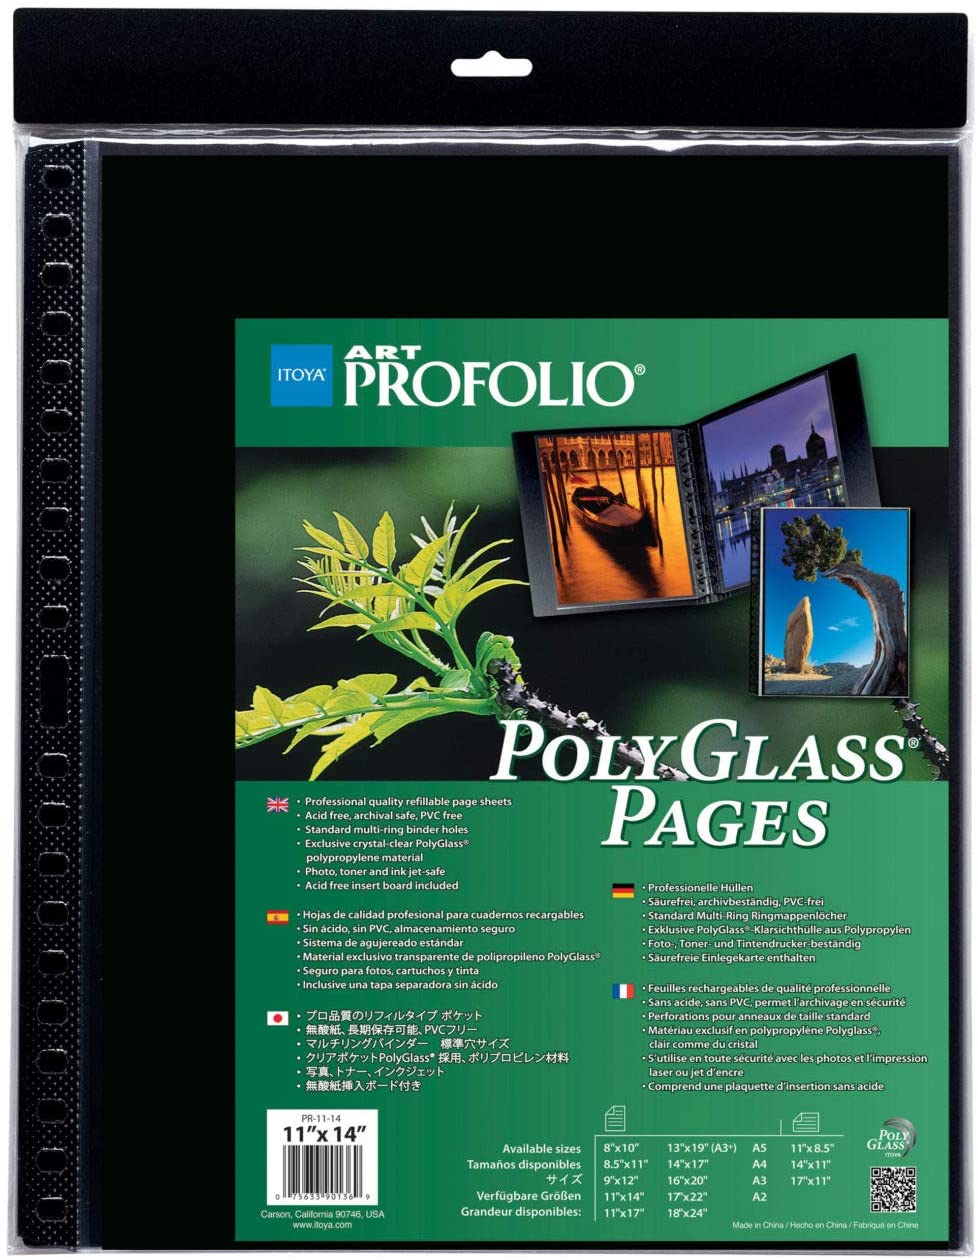 Set of 10 Refill Pages Set of 10 Refill Pages |
Quick Stats:
- Each new binder comes with 10 removable pages.
- Binders tend to be "sturdier" than folios and can stand (like a book) on their own without falling over.
- Because the pages are removable, you can add, remove, and reorganize pages without removing the art inside each page.
- Binders tend to be more expensive than folios.
- Product information page: https://itoya.com/products/binders/profolio-multi-ring-binder/
Itoya Folios
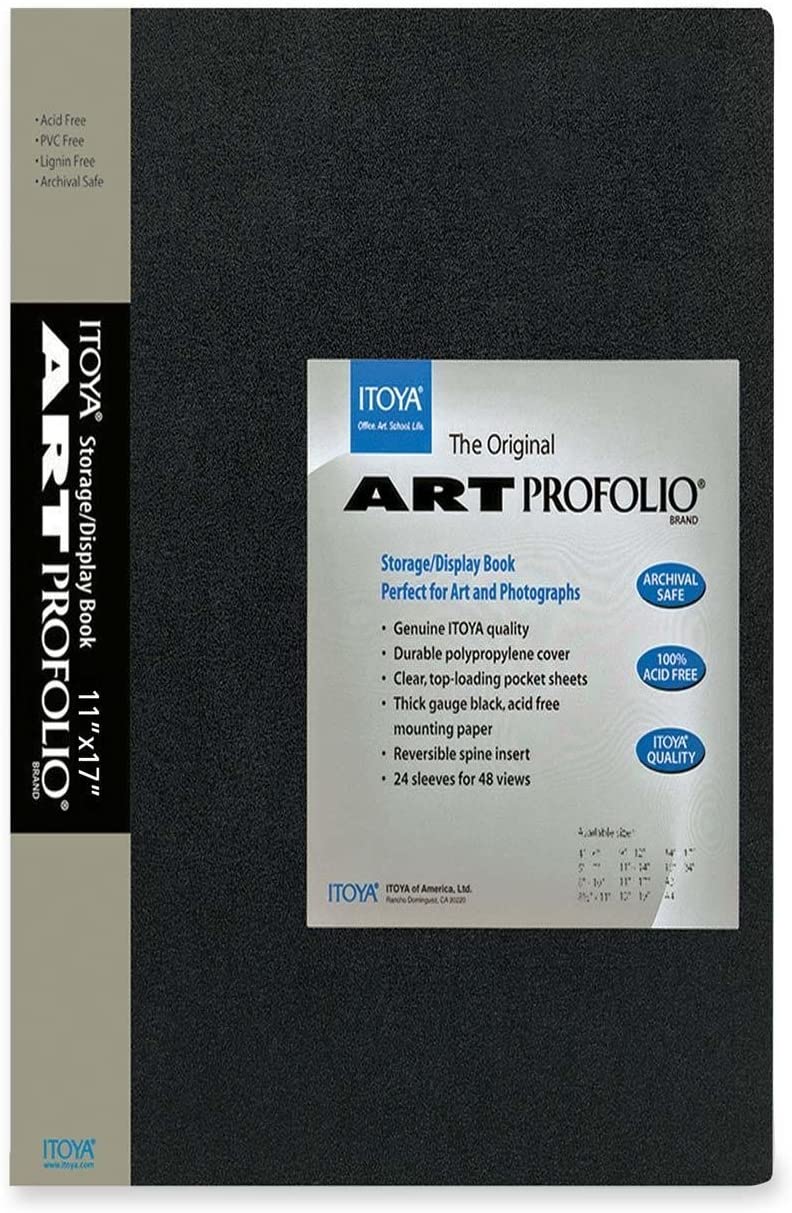 Itoya Art Profolio 11x17 in Itoya Art Profolio 11x17 in |
 Itoya Art Profolio 11x14 in Itoya Art Profolio 11x14 in |
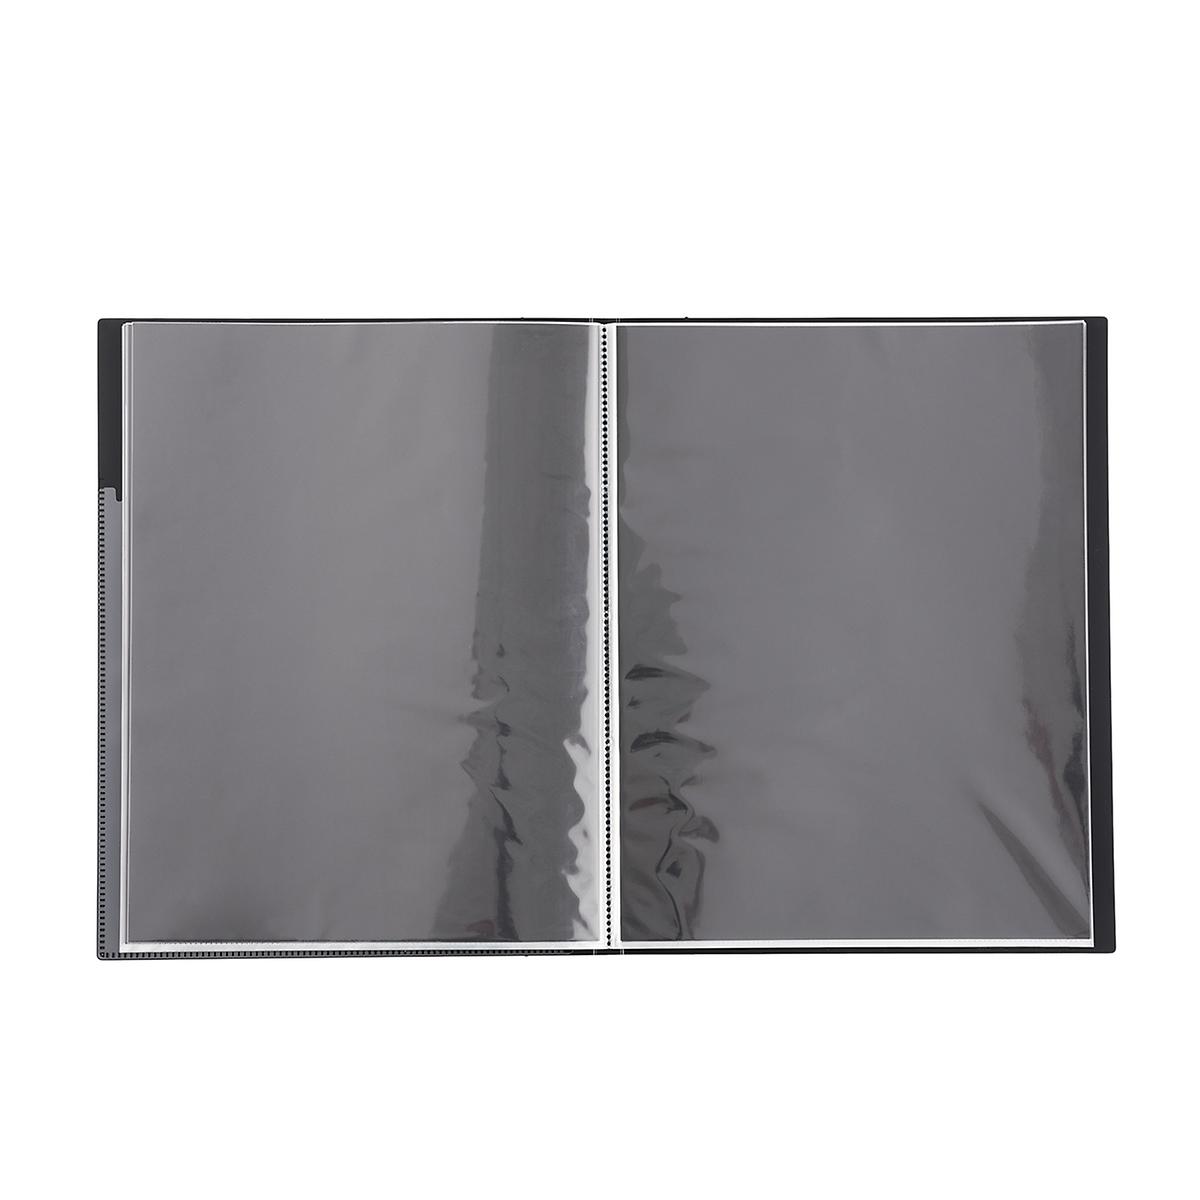 Inside View Inside View |
Quick Stats:
- Each new folio comes with twenty-four non-removable pages.
- Most folios will have difficulty standing on their own (especially with the weight of cels added to them).
- Because the pages are permanently bound to the folio, you cannot add, remove or reorganize pages. The attached pages also bend more at the binding, which can cause problems for cel paint.
- Folios tend to be less expensive than binders.
- Product information page: https://itoya.com/products/presentation-book-portfolios/the-original-art-profolio/ (NOTE: There are other types of folios available.)
Things to Consider
Whether you choose to store your cels/sketches/backgrounds in a binder or a folio the common sizes purchased by collectors are 11x14 or 11x17 inches. Both sizes are larger than a standard size cel. However, if you are storing backgrounds as well then you'll need something that is at least 11x14.
Another consideration when choosing between binders and folios is how you will store them and how much pressure will be placed on the art (cels in particular) as a result. Cel paint can crack and flake if too much weight/pressure is placed on them. One of the advantages of the binders is that they can stand on their own which, as long as you don't squeeze them into a tight space, will keep pressure off the cels inside. Some collectors even store their binders by running a blanket hanger through the binder rings and hanging them in a closet.
When it comes to storing cels, Itoya binders are a superior product when compared to their folios. However, folios are still better than nothing and may be a good starting point for newer collectors or for collectors who focus more on sketches, backgrounds, and other works on paper that are less vulnerable.
Microchamber Paper / Boards / Boxes

Microchamber paper with honeycomb watermark
MicroChamber Paper is a thin sheet of paper infused with SPZ zeolite molecules which have the ability to absorb and neutralize acids and pollutants such as those released by the collection itself. They are an essential part of animation art preservation.
Collectors should slip a piece of microchamber paper in front or behind their cels to absorb any off gassed fumes. If placing microchamber behind a cel please consider placing a sheet of clear plastic between the cel paint and microchamber paper to prevent the paint from sticking to the microchamber paper.
Note: When purchasing microchamber paper it will not always have the honeycomb watermark. Due to manufacturer issues they no longer produce microchamber paper with the watermark.
Other storage products using Microchamber/Zeolite technology include art backing boards and storage boxes. Please be aware there are also buffered / acid- free backing boards and boxes available on the market (not the same as microchamber technology but they are still a step up from non-buffered goods). If using buffered backing boards it is not a bad idea to slip a piece of microchamber paper in between the art and the backing board as fail-safe. Boards using Microchamber technology have the term "ArtCare" in their name.
.jpg)

Example of Lodima archival art boxes made with Microchamber technology. 2nd Photo: Sketches stored with archival backing boards and Mylar Bags.
Examples of Where to Buy:
6-1/2 x 8-1/2" Microchamber Paper at https://www.bagsunlimited.com/
8-1/2 x 14" Microchamber Paper at https://www.bagsunlimited.com/
10 x 12" Microchamber Paper at https://www.bagsunlimited.com/
"MIP-IT" Microchamber Paper (multiple sizes) at https://www.ready-set-collect.com
11 x 14" Thin Bainbridge® Alphamount ArtCare Backing Boards at https://www.clearbags.com/ (reviews say it is on the thin side but it does use Michrochamber tech)
32 x 40" 4 ply Single Sheet ArtCare Boards at https://www.utrechtart.com/
32 x 40" 4 ply Single Sheets ArtCare Boards at https://www.dickblick.com/
ArtCare Boards at https://www.talasonline.com/ (only available as a case of large boards, if you have a cutter and need a large amount of boards you can cut them down yourself)
Conservation Grade Backing Boards (11 x 14") at https://www.bagsunlimited.com/ (buffered NOT MC grade)
Conservation Grade Backing Boards (multiple sizes) at https://www.bagsunlimited.com/ (buffered NOT MC grade)
Archival Art Boxes: https://www.lodima.org/archival-materials/archival-boxes
Links For Further Reading:
CG Comics Forum - Backing Board PH Test Experiment
Sun/UV Damage Examples
Like most other kinds of art, production animation art is sensitive to UV light. For art on paper, the damage usually presents as yellowing or other discoloration. These two sketches were held in a double frame (supposedly with archival quality glass/materials) and displayed in a Warner Bros. gallery before being purchased and displayed in someone's home. One side of the frame was commonly exposed to sunlight, while the other was mostly in shadow. As you can see, the sketch exposed to sunlight shows significant discoloration.


UV damage to cels will normally present as line fading. Hand drawn cel lines began falling out of popularity following the advent of Xeroxed line work in the early 1960s. The big downside of Xeroxed line work is that the pigment can be very fragile and may degrade quickly in sunlight. Below are a few examples.
Collector's Note: Line fading can happen even without continued exposure to sunlight. However, it will greatly speed up the process.

This cel from Batman TAS shows an almost complete loss of the line work. Note the lack of facial features.

This cel of the Penguin shows partial line fading. It gives the lines a broken look.

Again, this cel from Fern Gully shows an almost total loss of lines.
Removing Adhesive Tape From Sketches Using Eucalyptus Oil
The bulk of this topic has been copied directly from a post on anime-beta created by Sensei. The original can be found here. Given that anime-beta can go through occasional periods of down-time, it may be prudent to duplicate some of the valuable knowledge stored there. This is part of that effort.
WARNING: DO NOT USE THIS PROCESS TO REMOVE TAPE FROM CELS!
You will need:
- A bottle of purified, steam-distilled eucalyptus oil.
- You want the straight stuff, not diluted in any way. Small bottles are sold in the aromatherapy sections of health stores, or you can get larger bottles at online sites like Lucky Vitamin for about the same price. Keep in mind that eucalyptus oil is poisonous if swallowed by children and can cause dermatitis if accidentally spilled on the skin in quantity. It might be a good idea to keep the big bottle locked up and use a smaller bottle for your work and refill it periodically.
- A supply of cotton swabs.
- Use the kinds with paper sticks as the eucalyptus oil may dissolve the plastic ones.
- A box of facial tissues.
- The "hypoallergenic" kind with no added lotion, fragrance, or aloe vera.
- A small craft knife, the less sharp the better.
- A plain cardboard surface. (Something without anything printed on it.)
- A well ventilated space to work with good light.
- A garage with the door open or a well ventilated room (with the windows open) will probably work. Euclyptus oil has a very strong odor.
- A stack of sketches with yucky tape on them.
- Some is yuckier than others: frosted tape is often the most stable, yellow-colored tape the most likely to cause trouble. If you hold the sketch up to the light and see that the part covered by tape is more translucent than the rest of the paper, that's an early sign of damage and a warning to get the tape off asap. (It's worth noting that the Library of Congress considers all forms of adhesive tape potentially dangerous to paper collectables, including allegedly acid-free scrapbooker's tape.)
This is the strategy that has been reported to work:
- Wash your hands, before and frequently during the process, as dirt and oils from your skin can also cause damage down the road. Some collectors use inexpensive throw-away cotton gloves during this process.
- Put the sketch down on the cardboard base, tape side up. Use one of the swabs to dab eucalyptus oil all around the edges of the tape. (Do this for no more than 4 inches of tape at a time, as the oil evaporates quickly).
- Turn the sketch over and saturate the paper directly under the tape with the eucalyptus oil. Don’t be cheap – the more you use, the cleaner the tape will come off.
- Turn the sketch over again and use the craft knife to get under one end of the tape and slide the blade between the tape and the paper. It should separate from the paper smoothly but reluctantly. When you get enough of the end up, you could grab it with your fingers and peel it the rest of the way. Go slowly and watch out that the paper doesn't start peeling up with the tape. (This happens more often with thin yellow or pink paper than on thicker paper.) If you see a peel starting, stop, turn the sketch over, apply more eucalyptus oil, and start again from the other end. For thin paper, stick with the craft knife and go more slowly.
- When the tape is off, soak the swab again in the eucalyptus oil and flood the area where the tape used to be. It's the adhesive, not the tape, that causes the damage, so you want to saturate the area to soften as much of the remaining adhesive as you can. You will often see the adhesive "resist" the oil and leave a dry spot underneath. When you see the oil soaking evenly through the area, that's a sign that you are removing the worst of the glop.
- Take a paper tissue and rub the place carefully, looking to see that the adhesive is coming up. It is generally best to wipe in a single direction at a time. When you’re done, the paper should look “flat,” not “shiny.” This can take more time than you think. You will likely need to add more eucalyptus oil after the first effort to get up all of the stickiness. Change tissues regularly.
- Let the sketch dry out thoroughly. Overnight is best.
- Put the tape, used swab, and tissues in a trash bag and put them outside, unless you're very attached to the smell of eucalyptus.
- Bag the sketch to keep now-separate pieces together and prevent any damage that remaining adhesive might cause to sketches stored next to it.
A few warnings:
- AGAIN: DO NOT USE THIS PROCESS TO REMOVE TAPE FROM CELS!
- Eucalyptus oil does not lift graphite or printed ink on layout paper. It does lift anything that has been photocopied. So if you use it on copy layouts, be very, very cautious and expect some degree of smudging or image loss.
- Eucalyptus oil also does lift some colored pencil marks. Use caution if your sketch is done in colored pencil and test an inconspicuous part before going ahead.
- Eucalyptus oil will melt/damage plastics. Do not use a plastic container or applicator of any kind.
Other info:
This method has been used successfully to remove tape from watercolor backgrounds and did not shift or lift the colors on the items tested. However, this may not be universally true and caution is recommended in such cases. Also, the eucalyptus oil can move dirt embedded in the paper around the tape as it soaked through the paper, so that when it dries, there are a series of "tide marks" around where it is used. Careful blotting with a cotton ball soaked in the oil may be necessary to redistribute the dirt and soften this "ring around the tape spot." (One library site suggests filling a tray with the solvent and soaking the whole sketch in it to avoid such "tide marks.")'
A note from Sensei (the original author):
This is no more than a record of my personal experience with the process, checked with a number of online librarians' sites dealing with the same issue. For that reason, I'd be happy to be challenged or corrected on any of the procedures mentioned. My only priority, as I've said elsewhere, is to try to ensure that the art objects that I collect remain in at least the same physical condition in which I received them. This is a challenge, as most forms of animation art suffer from what paper collectors refer to as "inherent vice," or the tendency to deteriorate over time due to the very substance from which they are made. Yet they are unique records of a creative process, and once they are defaced, they are defaced for eternity. It's important for serious collectors to confront this issue and find some safe, responsible way to check this deterioration.